Welcome to part three of our tutorial on building themes with JavaScript. In part one we considered the JavaScript web landscape and where it leaves us today. In part two we looked at the forthcoming WordPress REST API. In part three, we will consider the most pertinent question: how do we apply all this to WordPress theming? Some of you are likely already realizing that there are surely a lot of challenges in doing so. And you would be right.
Watch the video presentation or read the transcript below.
Demo Materials
You’ll find accompanying material for this screencast available in a public GitHub repo — each screencast has a corresponding folder with a very simple theme that can be activated.
Getting Real
As you may have noticed in the previous tutorial’s files, we need a theme skeleton to make a project like this work. Fortunately, WordPress only requires themes to have a style.css and index.php file to be recognized. Beyond these two files, we can build the whole thing in JavaScript. If this thought is setting off alarm bells for you right now, I understand. Put those alarm bells to one side for just a little while.
If we are going to build a theme with JavaScript, we probably don’t just want one massive JavaScript file. We also don’t want to have to enqueue lots of separate JavaScript files just for the sake of keeping things tidy. Fortunately, others have already done this work for us. CommonJS — a project which, like Node.js, kicked off in 2009 — has created a myriad of specifications and conventions for JavaScript developers to follow; they’re a bit like a JavaScript version of the W3C. The CommonJS project has created specifications for JavaScript modules, which we can use to split up our code. JavaScript modules allow us to create something similar to a WordPress theme, with different JavaScript files containing different template parts and theme files.
Although we can split out our code into different JavaScript files as we can with PHP, unlike with PHP, we’ll want to concatenate these files into one when we run the theme. In theory, we don’t have to do this — but if we don’t, each page would need to enqueue lots of different JavaScript files, which is bad for performance and user experience.
To concatenate the files we’ll will need to use a build tool, such as CodeKit, Grunt, or Gulp. We can even use Unix’s Make utility, which was first released in 1977(!), to run our build process. At this stage, it doesn’t really matter, as the main thing our build process will do is smoosh our JavaScript files into one file, so whichever utility you’re most comfortable with is fine. For this tutorial, I’ll use my current favourite, Webpack.
Let’s take a look at how these JavaScript modules work. In part two, I showed an example of a very basic JavaScript theme with some inline JavaScript. We were breaking quite a few WordPress conventions, with everything in one big index.php file.
I’ve now broken this up and turned it into a more conventional theme. In index.php we now just get a header and footer. We’re now enqueueing our JavaScript in our functions.php file correctly. And our JavaScript file now sits on its own.
But if you look closely, you might notice something has changed. Our changePost function has disappeared, and instead we are requiring the changePost function. If we go back to the containing directory, you can see that we also have a changepost.js file. This file now contains the changePost function. Note that at the bottom, we have a line that says module.exports = changePost. This is the CommonJS convention for defining what the module actually is. So when we require it, this ensures that what we require is the changePost function itself.
Let’s get concatenating. I’ve mentioned that we’re using Webpack, so let’s get that set up. First, you need to install Node.js. Fortunately, this is a lot easier than it used to be — simply go to nodejs.org and download the automatic installer for your system. Once node.js is installed, we can run a command to install Webpack:
npm install webpack -g
This gives us global command-line access to Webpack. With this done, we can now run the most basic Webpack command, which is to take a source file, and smoosh it into a compiled file. The command for this is:
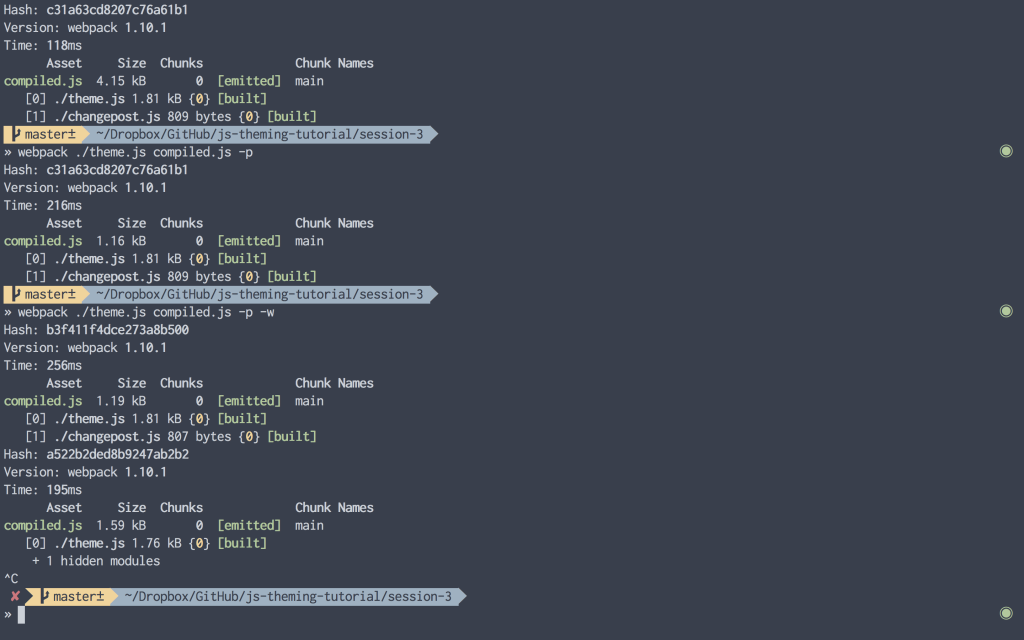
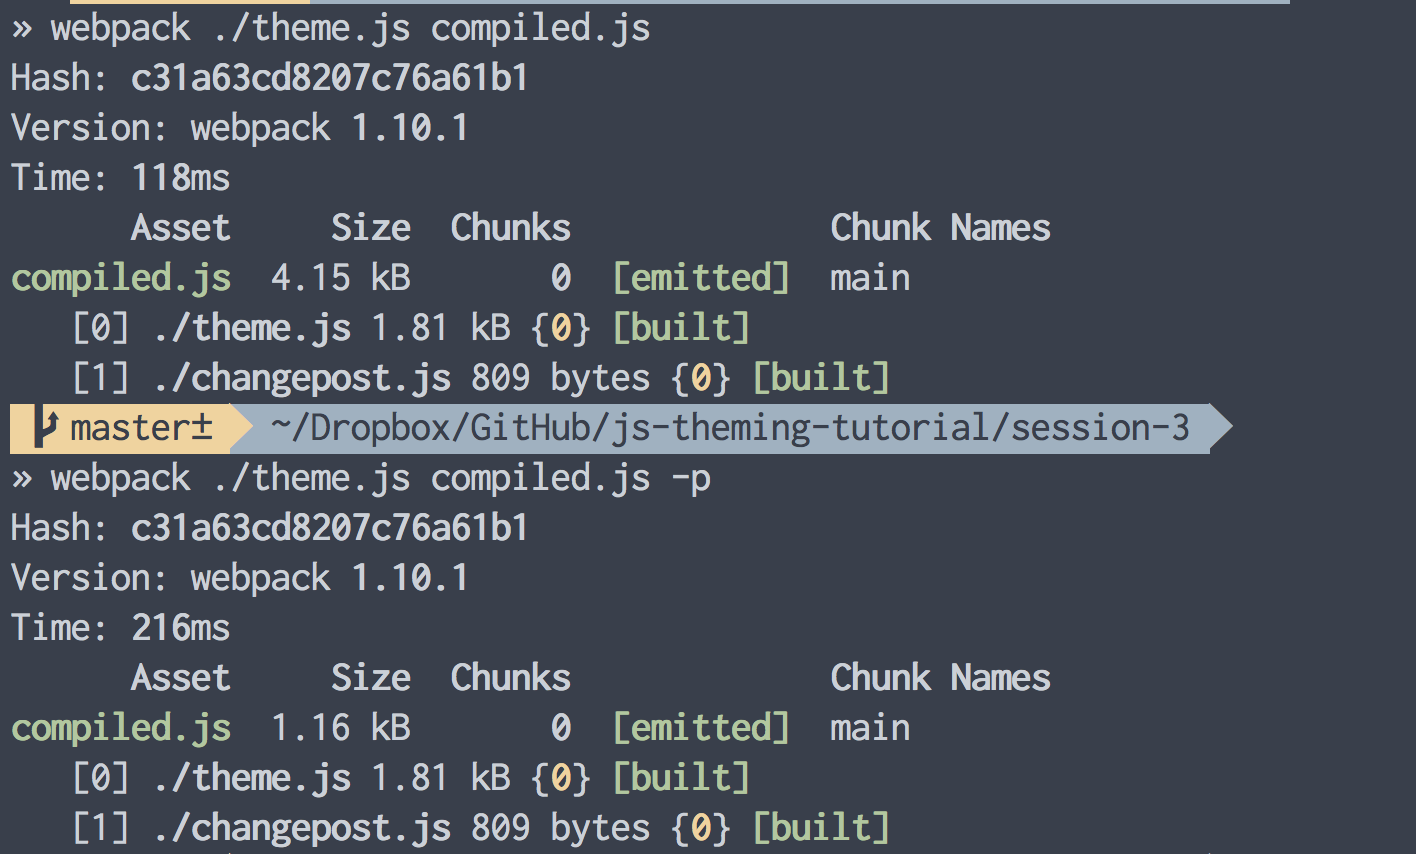
webpack ./theme.js compiled.js
We can now view the compiled file and see that it contains the contents of both changepost.js and theme.js. An extra little bonus with Webpack is the -p flag, which simply means that you want to minify the file – remove whitespace and remove all comments etc. You can see that even this simple example our compiled file is almost a third of the size it was unminified.
We can also add the -w flag which means we want Webpack to watch the files and automatically recompile whenever we change anything.
With the file compiled, we can see everything in action working together.
The Route of All Evil
With everything we’ve looked at so far, you can probably imagine stringing together a theme that allows a user to browse through different chunks of content from their website. However, a major missing piece is routing, something that you may not have heard of. Routing broadly encompasses the way that we deal with URLs changing. Let’s say a user visits our site, clicks to a different post and wants to share the link. With the examples we’ve looked at so far, this isn’t possible. Routing also ties into our user’s history. If we have no routes, the user can’t press the back button. No routing also means we have little chance of anything meaningful being indexed by search engines. I’m sure you can now appreciate that routing is very important.
In PHP, WordPress deals with this for us. There is a rather large class called WP_Rewrite (you can find it in wp-includes/rewrite.php). This handles every different type of URL and works out what should be shown to the user. In JavaScript, we don’t have this luxury, so we have to deal with it ourselves.
Let’s look at something basic we can implement.
If you look closely at changepost.js, you’ll notice that I’ve added a new line since the last tutorial. As well as editing the document on success, I’ve added a line that redefines window.location.hash. This is the most basic way of changing our user’s route. You’ve probably seen this used on other websites and it amounts to the same thing as using an anchor link to take the user to certain heading on a page.
Let’s look at this in action. Our eventListener has been added to the first link in the menu. If we click it, note that the route now changes.
So with some very basic routing, we now want to change what happens if the user clicks back.
If we go back to theme.js, the eagle-eyed among you may have noticed another line beneath my link listener:
window.onhashchange = changeRoute
We’re hooking a new function, changeRoute, onto window.onhashchange. Every time the URL changes, the browser fires a hashchange event, so this method allows us to tag our own JavaScript on to what happens when the hash changes. You can see beneath this I have a changeRoute function. Here, we say if the hash equals nothing — as in, we’re on the homepage — show the original post that we fetched in the first place. The code here is almost identical to changePost, but it just gets the original post.
What About no-js?
A few minutes back I mentioned that you might have alarm bells ringing. We’ve now likely dealt with a couple of those alarm bells. But we’re not done. Some of you may be thinking, “But what if the user doesn’t have JavaScript enabled? Or what if something has caused JavaScript to break?” In our current scenario, our website simply wouldn’t work.
There are some who don’t think this is a problem. Today, only a tiny number of people browse the web with JavaScript turned off, and for the most part they’re probably power users who fully understand why they have it turned off and know that it will limit their experience. But I am personally not convinced that we should just forget about no-js situations.
Will Somebody Please Think About the Search Engines?!
Even if we sort out our routing, what about search engines? As it happens, Google is now able to render JavaScript. I’m not sure if it’s official yet, but I’ve experimented with this. For example, the ThemeConf website has no server-side rendering, but try Googling “ThemeConf”. It also works on DuckDuckGo. Despite this, it’s not a great idea to rely on others to render your JavaScript — there are also places where this doesn’t work. Ironically, even though Facebook developed React, it doesn’t render JavaScript-rendered content when you’re embedding a link, for example. To see this in action, and if you use Facebook, try pasting a link to ThemeConf.com there. You don’t have to actually share it of course, but you should notice that the preview of the content Facebook will embed is blank.
I believe the most compelling reason to not rely on JavaScript rendering is performance. A developer at Google called Jake Archibald has given some great talks on this. In a worst-case scenario, our current theme makes our users wait for three page loads when they first arrive. First, the page loads, then the JavaScript loads, then the JavaScript loads the content from the REST API. Yuck! This may not be a problem if you’re connected with fiber-optic broadband, but if you’re on a mobile device or a spotty Wifi connection, you’ll really feel the pain.
This ties back into the search engine point, since we know that Google does take page-load times into account when ranking sites in search results. We really don’t want our load times to be three to four times longer than they need to be.
One way to tackle this problem with our simple theme example would be to add PHP to render the theme as well. In our simple example, this wouldn’t take too long and will work fine. The content would load exactly as the menu and footer loads, then the JavaScript will load and take over. However, this would very quickly get out of hand if we tried to build a whole theme. We would be forever having to repeat ourselves, and generally getting into a massive tangle.
Already, our simple JavaScript theme is starting to get pretty messy!
In the next part of this tutorial, we’ll look at how to move from our basic theme to something more advanced, building from an altogether more stable foundation.
The Series
- JavaScript, jQuery and the web landscape today
- Introducing REST APIs
- Challenges in JavaScript-Based Theming
- Bringing React into our theme
- Et voila, a JavaScript WordPress theme that uses the WordPress REST API

9 responses
[…] Challenges in JavaScript-Based Theming […]
[…] Challenges in JavaScript-Based Theming […]
[…] Challenges in JavaScript-Based Theming […]
This was an incredibly comprehensive, top to bottom look at what’s involved with retaining the power of the WordPress.org themeing system to creat JavaScript dominant apps. I feel like some of the names of things can even begin to really confuse any newcomers, and this separation and explanation of most makes perfect sense.
I really appreciate this comment. Thanks Lara! I find it difficult to explain a lot of this myself, so it’s great to know that it’s coming across well.
[…] Challenges in Javascript – Based Theming – ThemeShaper […]
Really looking forward to the next part of this.
Glad someone is actually addressing search engines as well, rather than just other developers!
Thanks! Looking real forward to the next episode!
qz.com is a great example of a javascript app communicating with WP API even though its the wordpress.com api.